Streaming USB2 and USB3 Cameras with libdc1394 in OS X
Preparing for Use
Before you use your camera, we recommend that you are aware of the following resources available from our Downloads page:
Getting Started Manual for the camera—provides information on installing components and software needed to run the camera.
Technical Reference for the camera—provides information on the camera’s specifications, features and operations, as well as imaging and acquisition controls.
Firmware updates—ensure you are using the most up-to-date firmware for the camera to take advantage of improvements and fixes.
System Configuration
We have tested the configuration noted in the table below.
|
Component |
Description |
|
MacBook Pro 15" |
Model MacBook Pro11,3 |
| CPU PC |
Intel Core i7 2.6 GHz |
|
RAM |
8 GB of 1600 MHz DDR SDRAM |
|
Operating System |
OS X 10.9.5 Mavericks |
|
Software |
Libdc1394 v.2.2.3 Libusb v.2.09 |
|
Camera |
GS3-U3-60S6M firmware 2.7.3.0 FL3-U3-32S2C firmware 2.7.3.0 |
System Set-up
The following setup instructions explain how to install libusb and libdc1394 and how to connect a camera to stream on OS X.
Install libusb
These instructions were tested with version 1.09.
- Download and install the command line tool and the latest version of Xcode from Mac App Store.
- Use Spotlight to locate Terminal and open Terminal.
- Install Macport according to the instruction on https://guide.macports.org/.
- Install pkg-config by entering
sudo port install pkg-config - Install libusb by entering
sudo port install libusb
Install libdc1394
These instructions were tested with version 2.2.3.
- Download libdc1394 from http://sourceforge.net/projects/libdc1394/files/libdc1394-2/2.2.3/.
- Extract the libdc1394 package on the desktop.
- Open Terminal and navigate to desktop.
- Enter the following commands:
sudo ./configuresudo makesudo make install
Note: At the end of the configuration, a summary of libdc1394 config appears. Verify that IIDC-over-USB support is enabled.
Before streaming images with a USB3 Vision camera, you must make a change to libdc1394’s library. To make these changes:
- Open the application terminal and navigate to the libdc1394 download folder.
- Open libdc1394 download folder and navigate to dc1394 →usb.
- Open capture.c.
- Replace the line:
libusb_claim_interface (craw->thread_handle, 0)
withlibusb_claim_interface (craw->thread_handle, 2) - Navigate to the libdc1394 download folder and enter the commands:
./configuresudo makesudo make install.
This step recompiles libdc1394 so that the changes take effect.
Connect and Verify the Camera
To connect the camera and verify that it can properly stream:
- Connect the camera to the Mac.
- Open libdc1394 download folder and go to the Examples directory.
- Run the Hello world example. This example detects the camera, captures a frame (not saved), and exits.
See the Troubleshooting section if Hello World indicates problems as follows:- If the Hello World example cannot detect the camera, see Troubleshooting 1.8.3.
- If the Hello World example cannot stream the USB3 camera, check that the camera is running at USB3 speed by following the instructions in Troubleshooting 1.8.4.
- If the Hello World example cannot stream the camera and fails at the DC1394_CAPTURE_DEQUEUE function, see Troubleshooting 1.8.5.
Streaming the Camera
To use a USB2 or USB3 camera in OS X, run the default examples found in the libdc1394 → Examples directory.
- grab_gray_image to save a grayscale image.
- grab_color_image to save a color image.
 |
Use a memory channel to save any configured camera settings. For more information on how to use memory channels, see Using memory channels to configure default start-up settings. |
Troubleshooting the Camera
How do I enable libdc1394 debugging?
Enable libdc1394 by entering the following command:export DC1394_DEBUG=1
How do I enable libusb debugging?
Use Terminal to navigate to the libusb download directory and enter the following commands:./configure --enable-debug-log —prefix="$PWD/usr"sudo makesudo make installexport DYLD_LIBRARY_PATH=$PWD/usr/lib
What if libdc cannot find my camera?
If the camera is not appearing in libdc, it may mean that the product ID is missing. To add the product ID:
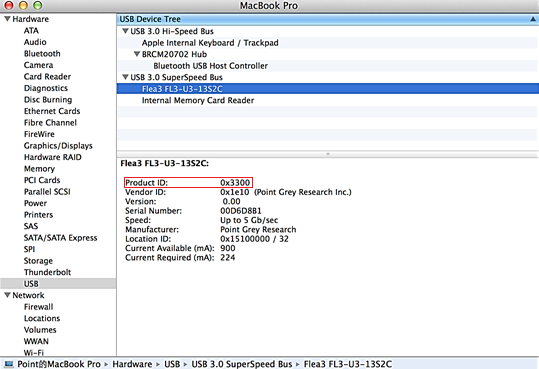
- Go to OS X System Information → Hardware → USB → USB Device Tree.
- Select the camera and note the Product ID and Vendor ID.
- An example of a Product ID is 0x3300.
- The Point Grey Vendor ID is 0x1e10.

- Go to the libdc1394 download folder.
- Navigate to dc1394 → usb.
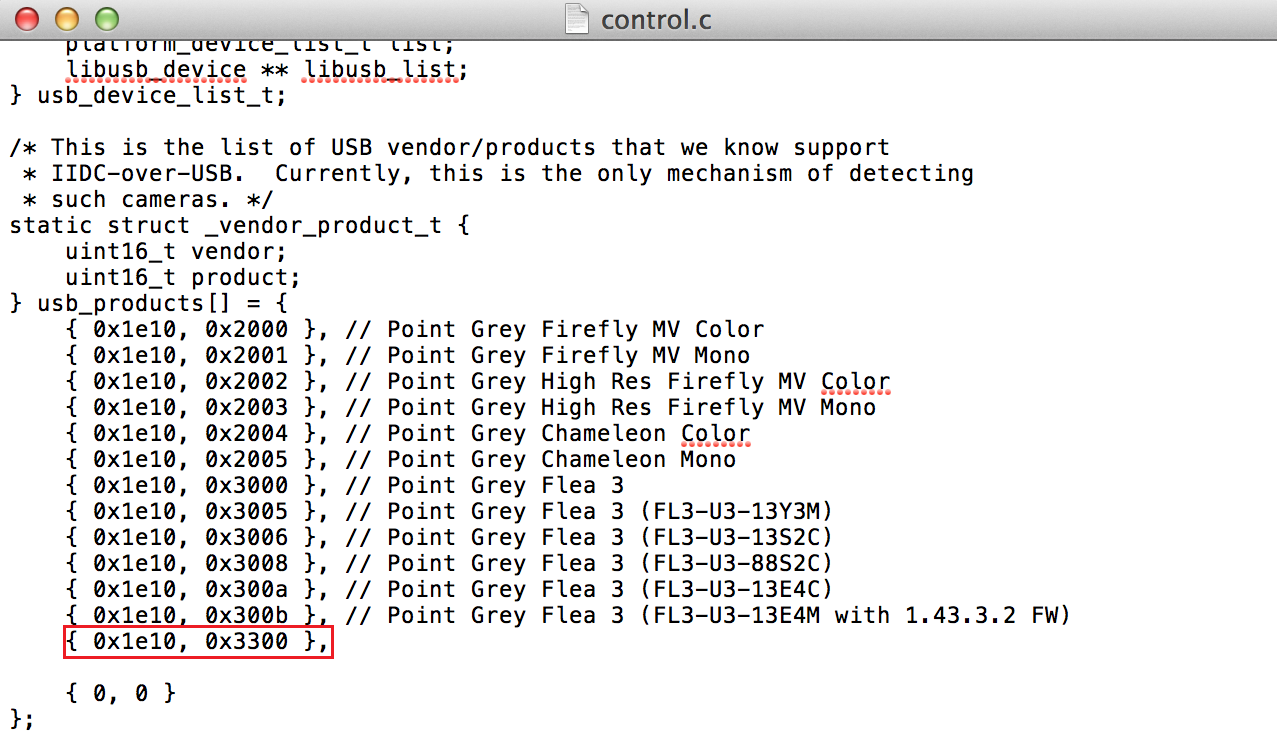
- Open control.c and search for usb_products.
- Enter the Vendor ID and Product ID as shown in the following example:
{ 0x1e10, 0x3300 },
How do I verify that my USB3 camera is running at USB3 speed?
To verify that the camera is running at USB3 speed:
- Connect the camera to the computer.
- Open the System Information application.
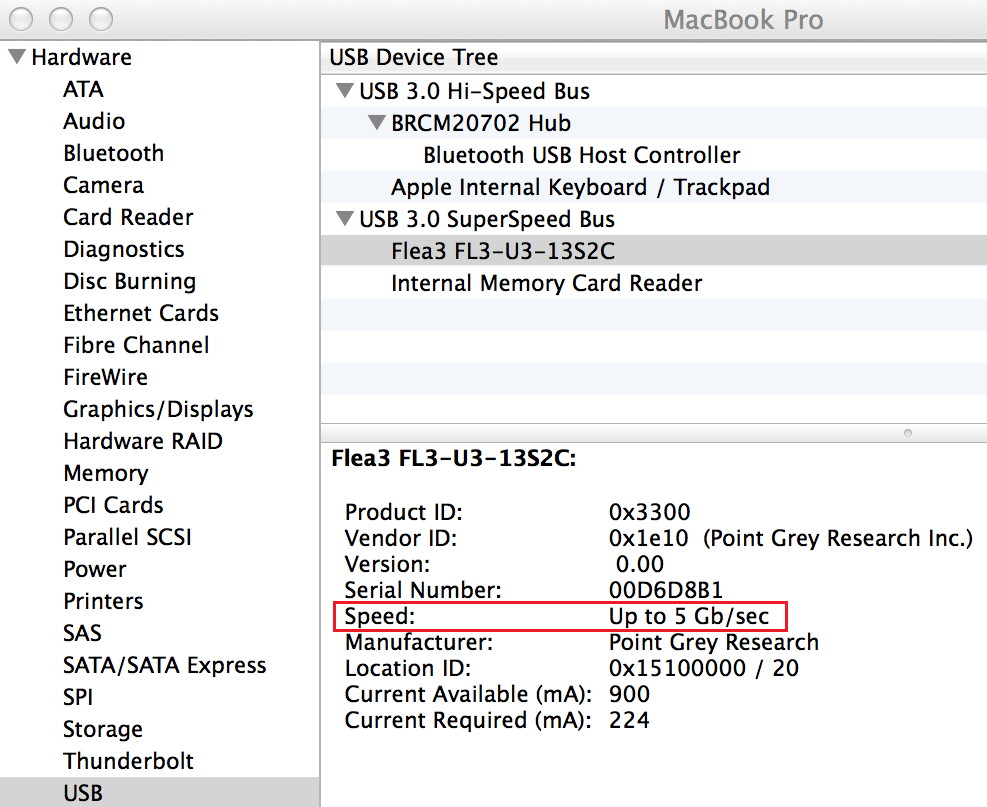
- Check the running speed in the window as shown in the screenshot to determine that the camera is running at the correct speed.
- Up to 480 Mb/s indicates that the camera is running at USB2 speed.
- Up to 5 Gb/sec indicates that the camera is running at USB3 speed.

If your USB3 camera is running at USB2 speed, verify that you are using the recommended USB3 cable and host controller card. Recommended USB 3.1 System Components offers additional details and suggestions.
The camera’s firmware may need to be updated to USB3. See Determining the firmware version used by my camera for information on how to find out what firmware version your camera is using. To update the firmware, follow the instructions in the next section.
How do I update my camera firmware to USB3?
 |
Camera firmware that supports USB3 Vision has USB3 Vision Firmware on the title of the download link. |
You can update your USB 3.1 camera firmware in Windows or Linux.
To update:
- Download the latest FlyCapture2 SDK from the Downloads page.
- Download the latest USB3 Vision firmware.
- Connect your camera to the computer and ensure it has powered up.
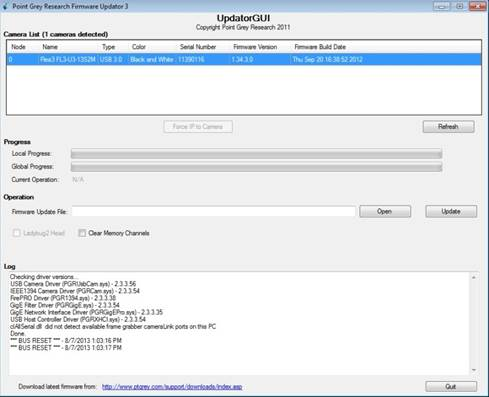
- Open the UpdatorGUI utility that was installed with FlyCapture2 SDK.
Start menu → All Programs → Point Grey FlyCapture2 SDK → Utilities → UpdatorGUI3
- Select the camera from the Camera List.
- Click Open to select the firmware file.
- Click Update to begin the update process. Do NOT disconnect the camera until the update is complete.
I see "dc1394_capture_dequeue(...)" failed to return an image
This is due to how libdc1394 and libusb handles buffer sizes. It’s a known issue with libdc1394 on OS X and Linux. To resolve this error, use either FlyCapture2 or libdc1394 to increase or decrease the image resolution by one or two pixels.