Getting Started with Matrox Imaging Library
Preparing for Use
Before you use your camera, we recommend that you are aware of the following resources available from our Downloads page:
Getting Started Manual for the camera—provides information on installing components and software needed to run the camera.
Technical Reference for the camera—provides information on the camera’s specifications, features and operations, as well as imaging and acquisition controls.
Firmware updates—ensure you are using the most up-to-date firmware for the camera to take advantage of improvements and fixes.
Installation and Configuration
The steps for installing and setting up depend which interface your camera uses.
|
FireWire Cameras |
GigE Vision Cameras |
USB3 Vision Cameras |
|
1. Install MIL |
1. Install MIL |
1. Install MIL |
|
2. Connect the Camera to the PC |
2. Connect the Camera to the PC |
2. Connect the Camera to the PC |
|
3. Start MIL |
3. Start MIL |
3. Start MIL |
|
4. Verify the Camera (FireWire) |
4. Verify the Camera (GigE Vision) |
4. Verify the Camera (USB3 Vision) |
|
5. Start Acquisition |
5. Start Acquisition |
5. Start Acquisition |
The following sections provide more detail.
Step 1—Install MIL
MIL is available for download from the Matrox website.
Follow the installation instructions.
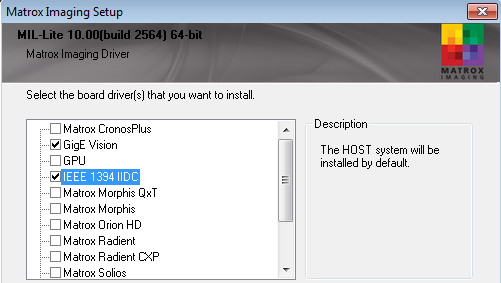
For FireWire and Gige Vision cameras, you must select the board driver specific to your interface during installation.

 |
You can select multiple board drivers during installation. It is recommended that you select board drivers for any interface you might require. |
For USB3 Vision cameras, ensure MIL 10 Update 1 is also installed.
- Go to Updates→Download Manager to update the version.
Step 2—Connect the Camera to the PC
Connect the camera to the PC. For information, see the camera’s Getting Started Manual.
Step 3—Start MIL
To start MIL:
- Launch Matrox Control Center.
Start Menu→All Programs→Matrox Imaging→MIL Control Center
- Under General Tools, click MIL Config.

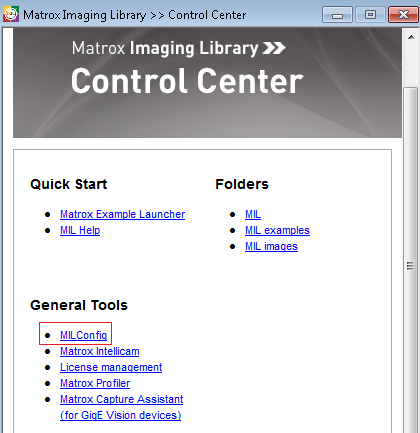
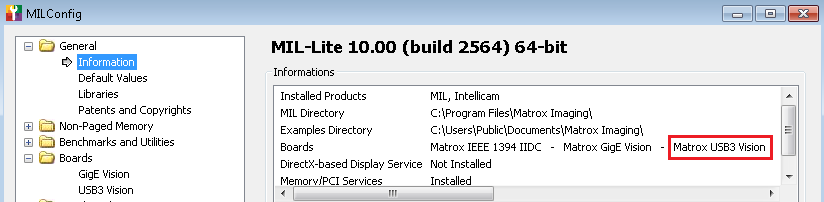
- In the MIL Config window, from the General folder, click Information to view the boards installed:
- FireWire—Matrox IEEE 1394 IIDC
- GigE Vision—Matrox GigE Vision
- USB3 Vision—Matrox USB3 Vision
| |
More than one can be installed at the same time. |
If your board does not appear, return to Step 1 and reinstall MIL.
Step 4—Verify the Camera (FireWire)
For FireWire cameras to work, the Matrox Imaging Adapter driver must be installed.
To verify your driver:
- In Windows Device Manager, verify the bus host controller is listed as “1394 OHCI Compliant Host Controller”.
- If you are using the FirePRO driver, the host controller is labelled “Point Grey Bus Host Controller”. In that case, update the driver:
a. Right click the host controller and select Update driver software.
b. Click “Browse my computer for driver software”.
c. Click “Let me pick from a list of device drivers on my computer”.
d. Select “1394 OHCI Compliant Host Controller”.

3. In Windows Device Manager, verify the connected FireWire camera is listed under “Matrox Imaging Adapter” as “Matrox managed IIDC 1394 camera “.
4. If you are using the Point Grey camera driver, the camera is listed under Point Grey Research Devices as PGR <Camera Model>”. In that case, update the driver:
a. Right click the camera and select Update driver software.
b. Click “Browse my computer for driver software”.
c. Browse to C:\Program Files\Matrox Imaging\Drivers\IEEE_1394_IIDC\sys\image_mtx and click Open.


Step 4—Verify the Camera (GigE Vision)
To verify your GigE Vision camera:
- In the MIL Config window, from the Boards folder, select GigE Vision.

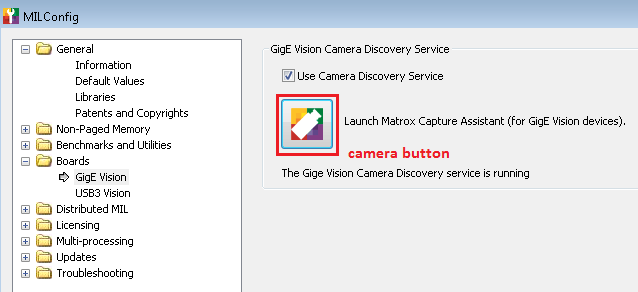
- Click the camera button to Launch Matrox Capture Assistant.

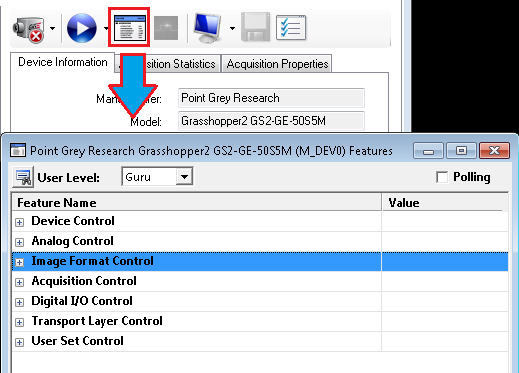
- Click the List Box button to configure the camera settings using GenICam features
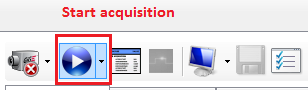
- Click the Play button to acquire images.

If the camera does not appear in Matrox Capture Assistant, it could be because the Matrox GigE Vision Filter driver is not installed.
To install the Matrox GigE Vision Filter driver:
- In Windows Control Panel, go to Network and Sharing Center.
- Click on the GigE Vision camera’s Local Area Connection.


- Click Properties.
- Ensure the Matrox GigE Vision NDIS 6.2 Filter Driver is selected.

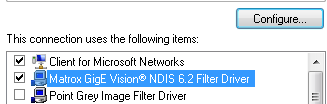
- If Matrox GigE Vision NDIS 6.2 Filter Driver is not shown, click Install.
- Select Service and click Add.
- Click Have Disk and browse to: C:\Program Files\Matrox Imaging\Drivers\mtxgigefilter\sys
- Click Open.
Step 4—Verify the Camera (USB3 Vision)
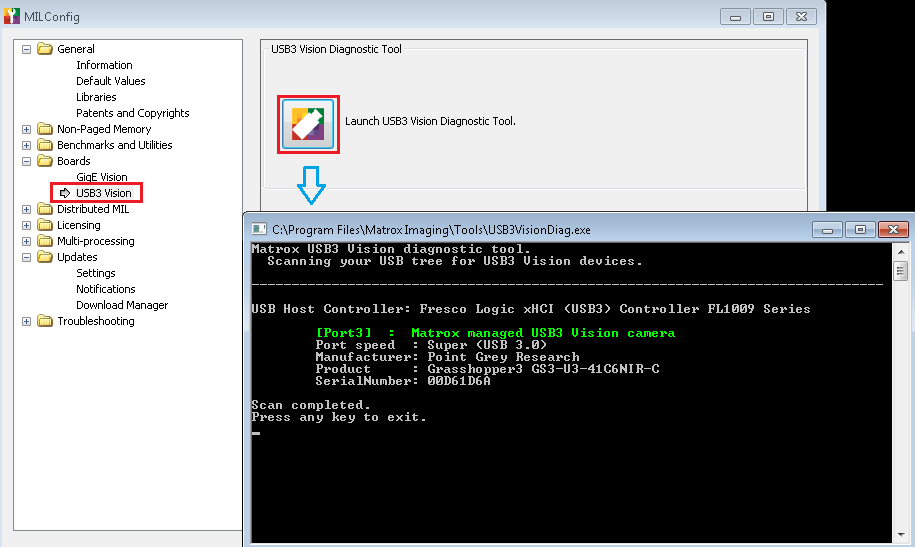
To verify your USB3 Vision camera:
- In the MIL Config window, from the Boards folder click USB3 Vision.
- Click the button to Launch USB3 Vision Diagnostic Tool. This brings up USB3VisionDiag.exe, a popup console application.
- If prompted to update the driver to Matrox USB3 Vision select ‘y’. The Matrox USB3 Vision driver is then automatically installed.
- Press any key to exit the console application.
Step 5—Start Acquisition
To start acquisition:
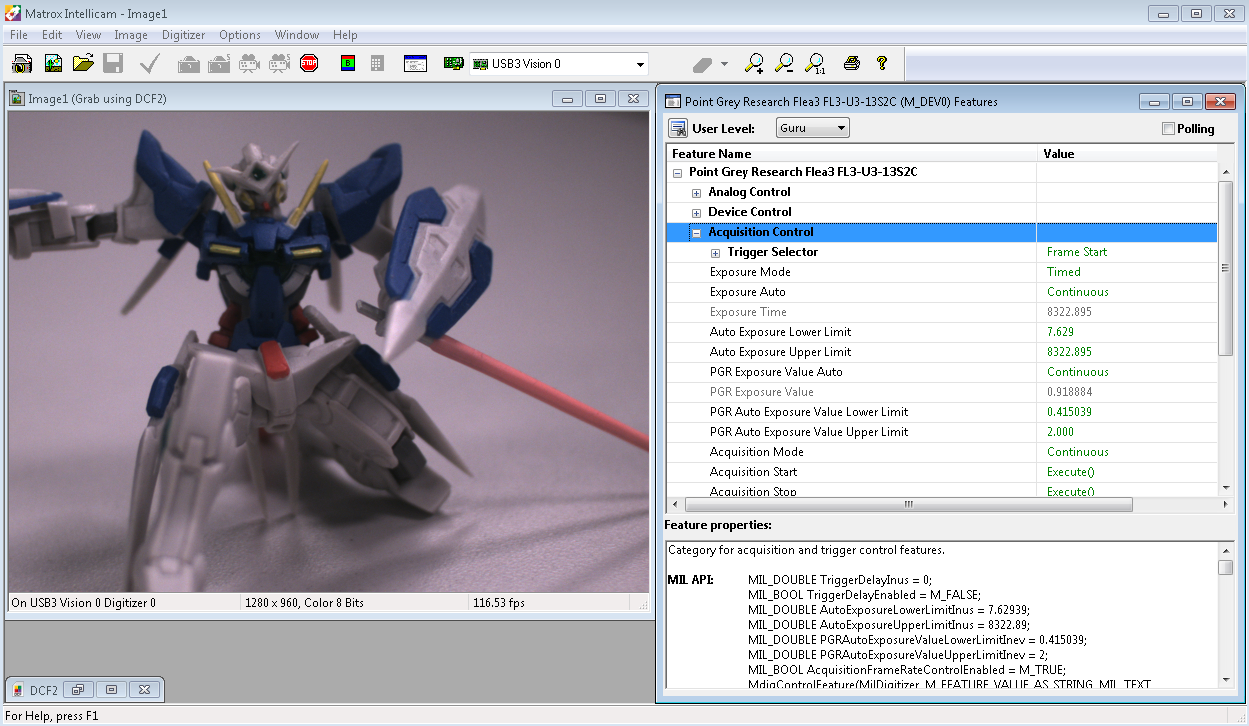
- In the Matrox Control Center window, click Matrox Intellicam
- In the Matrox Intellicam window, ensure the allocated system is correct for your interface.
- FireWire—IEEE 1394 IIDC 0
- GigE Vision—GigE Vision 0
- USB3 Vision—USB3 Vision 0


3. Click the Start New DCF button.

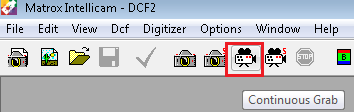
4. Click the Continuous Grab button to start streaming.
Troubleshooting Tips
The following suggestions may help you troubleshoot issues with your camera:
- Update the driver to the latest version.
- Update the firmware to the latest version.
- Update the software to the latest version.
- Perform a soft reboot and if still necessary a hard reboot of the PC.
- Disable then enable the driver.
- Power cycle the camera.
- Power the camera through GPIO, if wiring harness is available.
- Use a separate host controller instead of an integrated one, if available.
- Ensure the card is powered via the 4-pin hard drive connector, if applicable.
- Use a different cable or host controller or PC.